Running the program
Before we explore further examples, let’s cover the general steps to build and run any program on the Raspberry Pi Pico 2. The Pico 2 contains both ARM Cortex-M33 and Hazard3 RISC-V processors, and we’ll provide instructions for both architectures.
Note: These commands should be run from your project folder. This is included here as a general step to avoid repetition. If you haven’t created a project yet, begin with the Quick Start or Blink LED section.
Build and Run for ARM
Use this command to build and run programs on the Raspberry Pi Pico 2 in ARM mode, utilizing the Cortex-M33 processors.
# build the program
cargo build --target=thumbv8m.main-none-eabihf
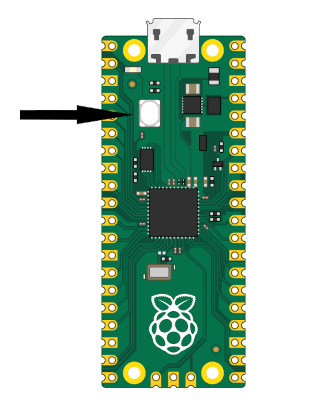
To Flash your application onto the Pico 2, press and hold the BOOTSEL button. While holding it, connect the Pico 2 to your computer using a micro USB cable. You can release the button once the USB is plugged in.
# Run the program
cargo run --target=thumbv8m.main-none-eabihf
Note
The example codes include a runner configuration in the
.cargo/config.tomlfile, defined as:runner = "picotool load -u -v -x -t elf". This means that when you executecargo run, it actually invokes thepicotoolwith theloadsubcommand to flash the program.
Build and Run for RISC-V
Use this command to build and run programs on the Raspberry Pi Pico 2 n RISC-V mode, utilizing the Hazard3 processors.
Important
This book focuses on ARM. Some examples may need changes before they work on RISC V mode. For simplicity, it is recommended to follow the ARM workflow while reading this book.
# build the program
cargo build --target=riscv32imac-unknown-none-elf
Follow the same BOOTSEL steps as described above.
# Run the program
cargo run --target=riscv32imac-unknown-none-elf
With Debug Probe
When using a Debug Probe, you can flash your program directly onto the Pico 2 with:
# cargo flash --chip RP2350
# cargo flash --chip RP2350 --release
cargo flash --release
If you want to flash your program and also view its output in real time, use:
# cargo embed --chip RP2350
# cargo embed --chip RP2350 --release
cargo embed --release
cargo-embed is a more advanced version of cargo-flash. It can flash your program, and it can also open an RTT terminal and a GDB server.